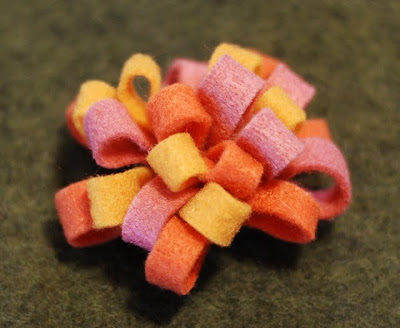
Felt Mum Brooch tutorial
 A co-worker has a pin similar to this on her coat and I've been admiring it for a while. She won't give it to me (even though I asked very nicely - she's not a good sharer) so I finally decided to try and make one for myself. I am a good sharer so I'm sharing my tutorial with you.
You'll need three different colored felt pieces, each one cut to 3 inches by 3 inches. Fold each one in half and sew each of them with a 1/4" seam.
 Cut two of the strips at 1/2" intervals, almost down to the seam but don't cut through the seam! You should have seven "petals" on each strip. Cut the third strip so that you create eight "petals". That one will be cut at a little less than 1/2" intervals.
 Lay the two seven "petal" pieces together, overlapping in the middle.
 Wrap the two ends around the overlapped center, as shown below.
 Take the third strip and butt it up against one of the ends (see below).
 Wrap the remaining end around, as pictured below.
 Sew the three wrapped pieces together along the seam lines from the first step. If you have a heavy duty needle, you might want to use it for this part. I didn't have one so I had to use a regular weight needle and I broke two of them while doing this. I finally figured out to go slowly, hand turning the machine when the needle initially entered the fabric. I'm going to buy heavy weight needles for the next batch of brooches I make. That will simplify this step and keep me happy, not cranky over broken needles and wasted time.
 Fold the flower in half and hand stitch the two ends together. I used invisible thread and it worked just fine. Felt is very forgiving and hides the invisible thread rather nicely.
 Hot glue a pin back onto the flat bottom of the flower.
 Your finished felt mum pin.
 And if anyone asks me for it, I'll share.
Comments
Post a Comment